The Arduino Awakening
The Components Finally Arrived
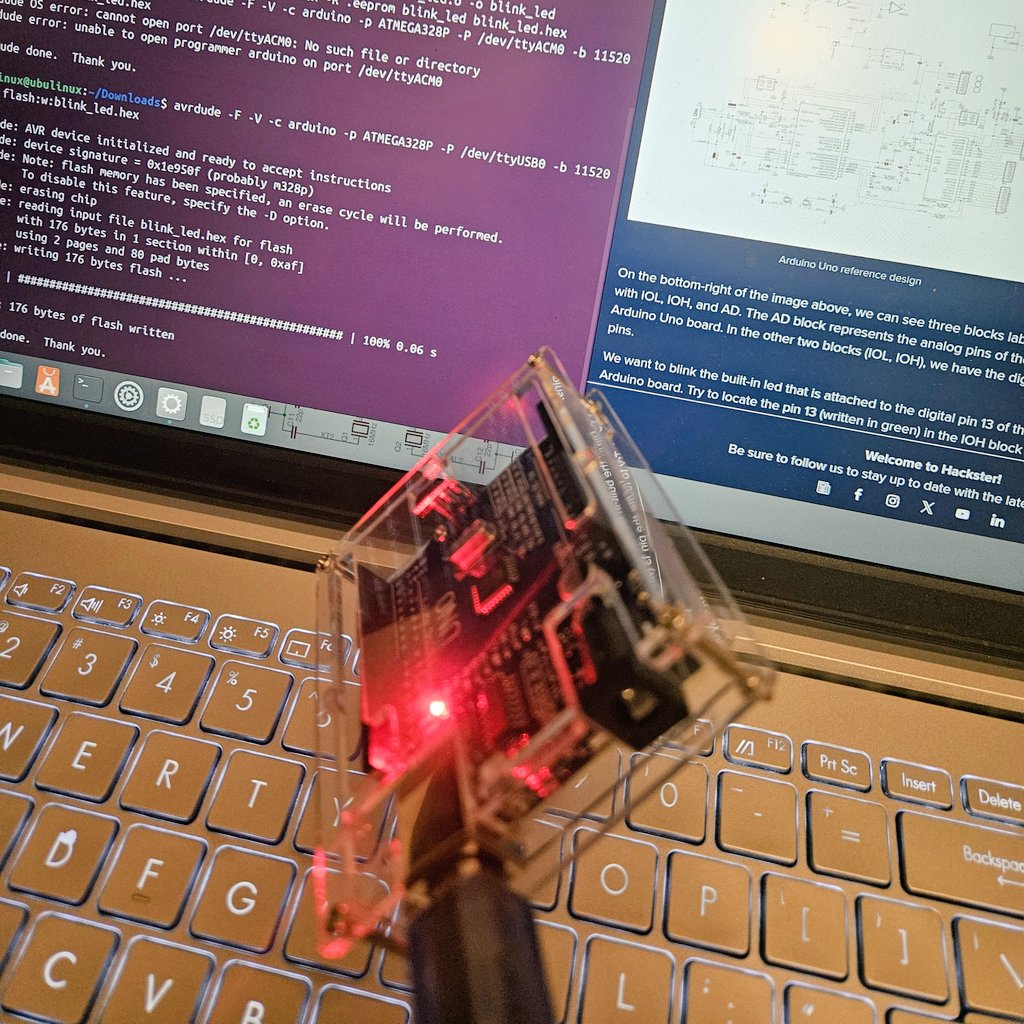
So, my electronics components finally arrived, and I first took my Arduino UNO and assembled the transparent case on it. Yes, I did that, yes I'm insecure about my Arduino UNO, but better safe than sorry, right? The first thing I did was the iconic LED blinky test, where you blink the LED after a delay in a loop function. I started with the built-in Pin 13 LED, that little orange light that sits right on the Arduino board. Then I moved on to one of the LEDs I actually bought and wired it up externally.
The next step was working with the breadboard itself. I took the LEDs and some male-to-male jumper wires, plugged the required wires to the digital pins, and started looking into tutorials. I spent the next 3-4 days going through about 50+ websites just looking for projects that used LEDs, wires, and buttons. Each tutorial taught me something new about circuit design and current flow, and more importantly, how not to fry components.
Here's the classic blink program that started it all:
// The classic blink program
void setup() {
  pinMode(LED_BUILTIN, OUTPUT);
}

void loop() {
  digitalWrite(LED_BUILTIN, HIGH);
  delay(1000);
  digitalWrite(LED_BUILTIN, LOW);
  delay(1000);
}
Getting Into Bare Metal Programming
Then I looked into bare metal programming, which my friend @aethei7v had told me about a couple of weeks prior. Instead of writing code in C++ and then having the Arduino IDE compile it to C and run it on the Arduino UNO, we can directly program the Arduino using AVR and AVR-dude. This completely changes how you interact with the microcontroller.
The Arduino IDE uses the avr-gcc compiler and avrdude to upload our programs to the microcontroller. So instead of relying on the IDE, we can do this process manually and get much more control. Here's how it works: first, we use avr-gcc to compile the source code (written in C) to obtain the corresponding object file. Then, through avr-gcc, we link the system libraries to the object file to produce the executable or the ELF file. Using avr-objcopy, we can translate the executable into a binary file that can be uploaded to the Arduino board using avrdude.
I found this resource that walked me through the entire process: Introduction to Bare Metal Programming in Arduino Uno. The level of control this gives you is incredible - you're essentially talking directly to the microcontroller without any abstraction layers. You can't rely on Arduino's high-level functions when you want to understand what's happening under the hood.
But then I realized that the components I got weren't enough to satisfy my embedded hunger. So, as you probably guessed, I made another order on Robu. But wow, look at that - they've now increased the minimum purchase amount that qualifies for free delivery, so I had to order even more components to meet the new requirement. They've arrived, but you'll have to wait till the next blog post to hear about those adventures.
Le Mans 2025 and Other Discoveries
Apart from my embedded experience, I also watched the 2025 24 Hours of Le Mans, which I've been continuously watching since 2016. This time it was my Polish legend Robert Kubica who won it, and watching him dominate was absolutely incredible.
During my research sessions, I also stumbled upon some fascinating stuff. I found this incredible schematic diagram of the RT-64 radio telescope receiver complex for pulsar research. The complexity and engineering involved in detecting signals from pulsars is absolutely mind-blowing, making my Arduino LED projects look pretty basic in comparison.
What's Next
The Arduino journey has officially begun, and I'm really enjoying the learning process. From simple LED blinks to exploring bare metal programming, each day brings new challenges and discoveries. The fact that I can now directly communicate with microcontrollers using AVR programming opens up a whole new world of possibilities. No more relying on Arduino's abstractions when I want to understand what's actually happening at the hardware level.
My new components should arrive soon, and I'm already planning more ambitious projects. Stay tuned for the next post, where I'll share what new components I got and what experiments I'll attempt with them. Until then, keep blinking those LEDs.